Creating a sauna from scratch isn't something most people do, but it's not impossible either. Several of the do-it-yourself plans we discovered online suggested it was feasible. It takes commitment to begin such a project, so it's important to think carefully about whether or not you really want a hot tub or sauna, and whether or not you want to build one yourself instead of buying one prefabricated.
In the absence of a kit, constructing a sauna from scratch can be a formidable task. The nitty-gritty of everything is fairly hard, which is why many homeowners choose for sauna kits and comparable assemblies to put together on their own.
Independent sauna construction without the use of kits is estimated to cost four to five times as much as the cost of the kits themselves, give or take.
Another option that could be cheaper, assuming you don't want a completely standalone room, is to convert an existing room into a sauna, although this presents its own set of issues. Take down all the wallboard until you reach the studs, and expose the joists in the ceiling, as well. Non-porous flooring, such as tile or plywood, is also necessary.
Including the wiring for a light, light switch, sauna heating wire conduit, and any controls you want to incorporate will require a complete redesign of the area. Congratulations, you've made the more difficult decision to employ a gas heater for your sauna. To safely run gas, you'll need to utilize a gas pipe and think about how thick you want it to be. Look no further; Portable Sauna has you covered.
There are few things more soothing than a session in a sauna, where the dry heat can penetrate your pores and flush away any lingering toxins. As much as a pint of sweat can be lost in a sauna session, and many health issues, including pain, asthma, and psoriasis, have been relieved by regular sauna use due to the cleansing properties of saunas. Having frequent spa treatments does not necessitate a significant financial investment. The health benefits of using a sauna can be brought right into your own house.
Is There a Good Spot for a Sauna?
There is no one right place to put a sauna at home; you can put it in an attached garage, an unused room, or even a converted shed. The bathroom is a perfect place for a spa, but you may also convert a spare bedroom into one. Showers, steam rooms, and massage features can all be included in a modern sauna. Unlike their indoor counterparts, saunas built in the great outdoors can take almost any form you can imagine. A sauna can take the form of a small cabin or cottage, a barrel, or even a bicycle wheel. Whilst there is a wide range of options for powering a sauna, it's important to keep in mind that not all of them are suitable for every sauna location. Traditional saunas use wood or gas heat sources, while the newer infrared saunas mimic the sun's rays and heat the room from within (the latter best built outside to make them more environmentally friendly).
FAQs About Sauna
Wearing something comfortable made of cotton is the best thing you can wear in a sauna. A classic oversized t-shirt, a loose-fitting cotton towel, and shorts are always good for the sauna. They allow your skin to breathe freely; this helps you enjoy a sauna session to its full potential.
Simply sitting in a sauna can enable you to decrease excess fat is not a reality. A sauna does not allow you to lose weight; it temporarily eliminates quickly replaceable water from the body. In addition, excessive heat makes your body sweat and sweating can make you lose fluid in the form of water.
Cooling off after the sauna is important because you can catch a cold if you sweat too much. Sauna-goers should leave enough time to cool down before warming up again. If you can, don't have a shower straight after the sauna. It's better for the body if you cool off in the fresh air first.
Take a warm shower just before your sauna session so you don't bring any dirt in. It also helps to open your pores and relax your muscles. But remember to dry completely off to sweat more quickly.
It is believed that sitting in a sauna can help you reduce excess fat. If you also believe in this, then you are absolutely incorrect. A sauna does not help you to lose weight; it temporarily removes easily replaceable water from the body. Excessive heat makes your body sweat and sweating can make you lose fluid.
What Equipment Is Needed to Construct a Sauna?
The next stage, after deciding whether your sauna will be indoors or out, is to get the space ready for building. If you're creating an indoor sauna, you'll want to make sure the floor is constructed of tile or cement and that there is no drywall anywhere in the space. You'll also need a sturdy base upon which to construct a cedarwood sauna's frame, which itself must feature openings in the floor, ceiling, and area above the heater to ensure proper air circulation.Check out our range of Portable Sauna Melbourne to help with your problem.
Lighting in the sauna requires wiring, and a drain is required to remove condensation. If you lack the expertise required to do electrical and plumbing work, you should employ professionals.
Controlling the sauna's temperature is also important during construction, both to keep energy costs down and to prevent the sauna from disturbing the ambient temperature of the rest of the house. Keeping the sauna at a comfortable temperature requires the installation of foil insulation on all walls. Because heat is retained, less fuel is consumed. Another component of maintaining a comfortable temperature within your sauna and driving out any excess moisture is the use of sauna rocks and a central heater. A vapour absorber will trap any moisture in the air before it can spread across the rest of your home from your sauna.
The last steps should include installing cedar (or another soft-wood) paneling, benches, trim, flooring, and a door. The sauna's cedar walls also aid in keeping the room dry while not in use. Saunas work best when the door is flush with the opening, sealing in the heat and moisture. Benches must be strong enough to hold the weight of anyone sits on them. You can put flooring anywhere in your sauna, and many sauna systems come with detachable floorboards for easy maintenance.
This guidance also applies to outdoor saunas and should be followed for the most beneficial results. But, you should put the sauna's framework and foundation at the top of your list of concerns.
Thing to Remember
An experienced do-it-yourselfer can breeze through the many procedures required to construct a sauna. Keep in mind the cost of a sauna. Prices for DIY sauna kits begin at around $2,000, with costs increasing with further features and personalization. It is recommended that a sauna be constructed in a quiet, peaceful location away from any sources of distraction, as its primary purpose is rest and relaxation. While picking between an infrared sauna and a standard sauna, it's also important to think about how well you handle heat. Lower temperatures are often emitted by infrared saunas.
Construction of a Sauna
Lighting Wiring
Put in outlets, switches, and conduit for electrical wiring, as well as any exterior controls, for your sauna heater. If you're installing a gas sauna heater, you'll need to think about the pipe's thickness and how many other appliances will be using the same gas line. Consult your gas professional. Also, the Portable Sauna Melbourne page has everything Portable Sauna related that you might need
Adding Insulation May Help Reduce Energy Bills
Get R-11 insulation for the inside and R-19 insulation for the outside. Rolls of fiberglass insulation can be found in widths of either 16 inches or 24 inches. Do not neglect the insulation process; it will save you money in the long run by keeping the sauna heat where it belongs. Sauna insulation will also act as a sound barrier, allowing you to unwind and sweat more effectively.
The Heat-Reflecting Foil
You can increase your sauna's insulation by R-1 thanks to the foil used as a vapour barrier. A foil vapour barrier should be stapled to the inside of every wall and ceiling. To avoid using foil tape, we often overlap the foil by three inches. Furthermore, you shouldn't use anything else in place of the foil. The foil is odorless and will never melt.
As the name implies, a vapour barrier prevents moisture vapor from penetrating building walls. The usage of steam in a sauna can help you work up a sweat, but the room where you do so should be kept sealed off from the rest of the house because of the humidity it generates (or spa).
The steam should escape out the vent; the cedar will dry out on its own. Naturally, the longer you leave the heater on in the sauna, the faster the interior will dry. For this reason, some sauna goers choose to extend their sauna session.
Boards Made of Cedar
Nail the cedar panel boards perpendicular to the joists, starting on one side of the ceiling. Cover more ground by navigating across the roof. Get a hole saw and make a slit for the lightbox if you need to. Lights and switches that can withstand moisture are ideal.
After the insulation and foil barrier have been installed, the clear cedar paneling boards can be nailed to the wall. Using a nail gun, attach the first horizontal row of tongue-and-groove wall boards to the studs, tongue up and groove down. It's best to get going from the bottom up. After the tongue has been snugly fitted over the preceding row, it merely has to be nailed in place. The nail can be concealed in a grove like this. Paneling a vertical wall involves either plywood sheeting over the studs or some horizontal studs positioned at appropriate intervals.
Row in your cedar panel boards, making sure they are level about once every four boards. Place the tongues into the grooves and proceed up the wall. There could be electrical junction boxes (for lights, switches, etc.) that need to be severed along the way. Cedar's beauty lies in its ease of cutting and sanding. Panel boards should be installed continuously until the insulated walls are completely hidden. When you're in the far back, bumping up against the ceiling, keep in mind that you don't have to be perfect. You're OK to go if you're within a quarter of an inch. Any imperfections can be hidden by the molding.
Sauna Heater Wall Mounting in the Middle
Two long and two short screws are included with the heater to help you mount it to the wall. The longer screws should always be used in the top position. They'll tighten the sauna heater to the wall and prevent it from moving.
I've located the screw holes and will be installing the two at the very top. Hold off on that chair. Also, hold off on installing the short screws in the bottom keyhole brackets for the time being.
The installation instructions state that there should be a space of 6 inches between the bottom of the unit and the floor. We use our second set of lower screws after we have put the sauna heater on the wall.
At last, have an electrician connect the device to the mains.
The Sauna Heater Must Be Installed
Assembling a sauna by plugging in an electric heater and then adding rocks
Install the sauna heater in accordance with the instructions provided. While some people may be venting-obsessed, remember that you need only air that is colder than your sauna. That being the case, even a temperature of 100 degrees is OK. Fresh air from the outdoors is nice, but not required. One vent behind the heater is fine, but two are preferable. A large opening under the sauna door is used by some.
A template and instructions are included with every sauna heater to show you at what height above the floor the warmer should be installed. Mounting brackets in the wall and an air vent underneath the sauna heater should also be considered. If there will be a lot of foot traffic through the sauna, or if the sauna heater is too close to the door, you may want to install a guard rail to protect people from burns and other dangers.
Preparing the Sauna Fire by Adding Rocks
We advise cleaning the rocks for your sauna heater before using them. An offensive odor could result from burning them if dust was present. If the rocks have been cleaned, they can be inserted. If you don't put the rocks in the sauna behind the heater element, the sauna's sensors can think the room is too hot and turn off the heat too soon.
There is a common concern about whether or not the vulcanite sauna rocks should be in touch with the sauna heater. It's intended for you to have that experience.
It's important to have a substantial number of rocks surrounding the heater element, but you shouldn't pack them in like a puzzle. If the sauna's heater is tricked into thinking it's hotter than it really is because of excessive heat retention, the device will turn off prematurely.
The sauna experience is perfected by the sauna rocks. They emit a form of heat known as radiant heat, which is a lengthy, low-level wave that feels like a gentle, penetrating warmth once it has penetrated the body. Once you've confirmed that the grill of your sauna heater still fits, you may lay your rocks atop it.
Due to the preservative on the elements, it is recommended to run the heater for at least an hour with the sauna door open prior to the first usage. When heated, these can give out some smoke. When you're done, fasten the sauna heater's grill to the top.
Prepare the Sauna Seats
Create or assemble the sauna seats next. There are typically two types of benches, one lower and one higher. Some people even make the narrow bench even wider, all the way to the wall.
DIY sauna benches typically measure 18 ", or more profound. You can get by with 2x2 supports and 1x4 tops on your benches, however it's best to build them stronger than you think you'll need (where you sit).
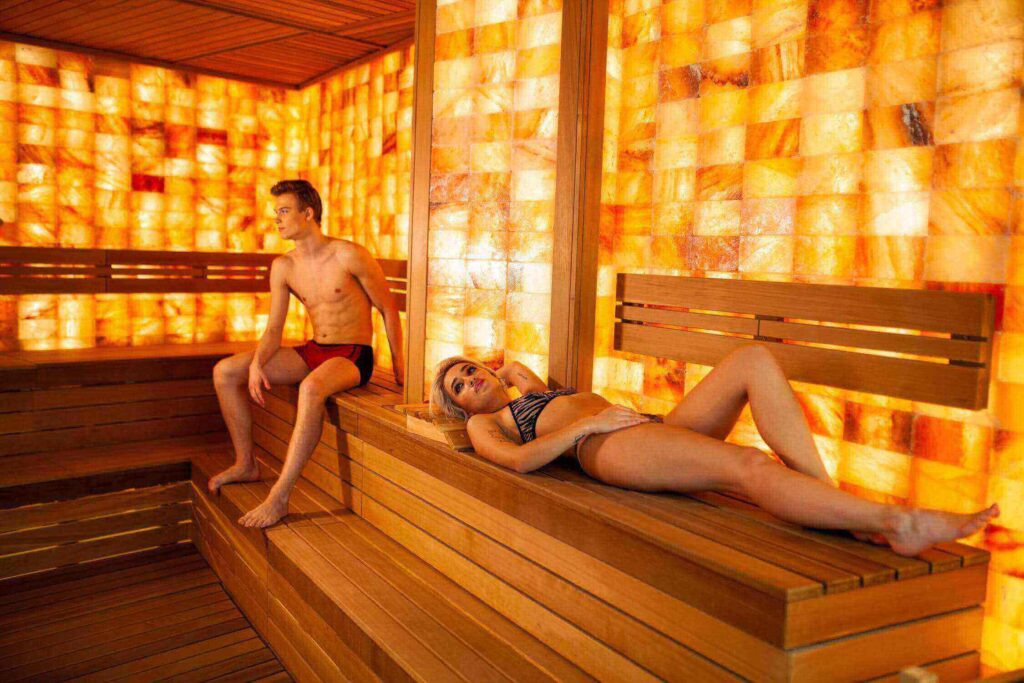
Lights installed beneath the seats in a sauna are a popular addition for some bathers and decorators. You may illuminate the walls and floor of the sauna with pleasant glow by attaching the facing to the bench.
Entrance to Sauna, Setup
Put in a sauna door made of cedar that has already been prehung. Believe me, you won't regret it. The swing and the accompanying frame are included in this package. Samples of our cedar sauna doors with etched glass and windows of varying sizes are available for your inspection.
Our factory doors typically have a rough opening of 24"x82" RO (rough opening). To some this may seem excessively restricted, yet in a sauna, a narrow door is essential for maintaining a high internal temperature.
Installing the self-closing hinges and door knobs in the sauna
Our door will need to be shimmed because of the difficult opening. A second set of hands will come in handy when you need to screw in the frame of your sauna door. Our favorite is the 2.5 "When installing the sauna's door, use galvanized deck screws. The identical ones we put on the benches in the sauna. When the door is closed, it will naturally conceal the screws.
Close and open the door again to ensure proper installation of the two screws. Verify your reveal to ensure accuracy. In this case, the reveal refers to setting the frame at an angle from the exterior wall, allowing the moulding to cover any spaces.
Verify the top and side reveals after you have installed the door frame and hinges. Shims can be used to close any large gaps while the door is being screwed shut.
After the door has been hung and leveled, you can install the handle at a convenient height. Often, I offset it by a couple of inches to the side.
Complete the Process by Doing Trim
Setting up the inner molding to hide the seams at the corners
As a last step, install the sauna's corner trim. In fact, some people actively avoid doing so. Your corner should be left alone if it looks fine the way it is. The decision is yours to make at home.
A set of 1"x1" corner trim is included in the package. Go out your finish trim nailer and nail the boards down on the best side. Take cautious not to over-adjust the compressor; 80 pounds should do the trick. You can also do it by hand with a little hammer.
Other sauna accessories, such as a backrest, leg rest, and headrest, can be purchased to increase one's level of comfort during a session.
Cedar sauna grab rails are available to provide support while stepping up or down from a high bench, which is especially useful when the floor is wet.
The Sauna’s Door Handle Must Also Be Installed.
When you purchase a do-it-yourself sauna, you can relax knowing that everything you need is in one convenient place and that it's nearly impossible to make a mistake. You'll find everything you need, including detailed instructions written specifically for your needs. The time, money, and aggravation spent converting an existing room or constructing a standalone sauna (say, in the backyard) is completely unnecessary. With a do-it-yourself sauna kit, you can be sure of exactly what you're receiving. Check out Portable Sauna Melbourne specialists in providing solutions to your problem. Check out Portable Sauna Melbourne specialists in providing solutions to your problem.
There are various paths you might take if you want to construct your own sauna at home, and perhaps some of these blueprints can spark an idea.
Conclusion
Creating a sauna from scratch can be difficult, so it is important to consider whether or not to build one yourself instead of buying one prefabricated. Converting an existing room into a sauna can be cheaper, but requires a complete redesign of the area and a gas heater. The most important details are the equipment needed to construct a sauna, the control of the temperature, and the use of sauna rocks and a central heater. Saunas should be constructed in a quiet, peaceful location away from distractions, with cedar paneling, benches, trim, flooring, and a door, and insulated with R-11 and R-19 insulation to reduce energy bills. Foil vapour barrier should be stapled to the inside of every wall and ceiling to increase insulation by R-1, and cedar paneling boards should be nailed to the wall to prevent moisture vapor from penetrating.
Install a sauna by plugging in an electric heater and adding rocks, using two long and two short screws, and a space of 6 inches between the bottom of the unit and the floor. The sauna experience is perfected by the sauna rocks, which emit radiant heat that feels like a gentle, penetrating warmth once it has penetrated the body. Lights installed beneath the seats in a sauna can provide a pleasant glow, so it is important to install a sauna door made of cedar and self-closing hinges and door knobs. A do-it-yourself sauna kit provides everything you need, including detailed instructions written specifically for your needs.
Content Summary
- It takes commitment to begin such a project, so it's important to think carefully about whether or not you really want a hot tub or sauna, and whether or not you want to build one yourself instead of buying one prefabricated.
- In the absence of a kit, constructing a sauna from scratch can be a formidable task.
- The health benefits of using a sauna can be brought right into your own house.
- Controlling the sauna's temperature is also important during construction, both to keep energy costs down and to prevent the sauna from disturbing the ambient temperature of the rest of the house.
- Keeping the sauna at a comfortable temperature requires the installation of foil insulation on all walls.
- Another component of maintaining a comfortable temperature within your sauna and driving out any excess moisture is the use of sauna rocks and a central heater.
- The last steps should include installing cedar (or another soft-wood) paneling, benches, trim, flooring, and a door.
- You can put flooring anywhere in your sauna, and many sauna systems come with detachable floorboards for easy maintenance.
- But, you should put the sauna's framework and foundation at the top of your list of concerns.
- Keep in mind the cost of a sauna.
- Prices for DIY sauna kits begin at around $2,000, with costs increasing with further features and personalization.
- Construction of a Sauna Lighting WiringPut in outlets, switches, and conduit for electrical wiring, as well as any exterior controls, for your sauna heater.
- You can increase your sauna's insulation by R-1 thanks to the foil used as a vapour barrier.
- A foil vapour barrier should be stapled to the inside of every wall and ceiling.
- Nail the cedar panel boards perpendicular to the joists, starting on one side of the ceiling.
- After the insulation and foil barrier have been installed, the clear cedar paneling boards can be nailed to the wall.
- Using a nail gun, attach the first horizontal row of tongue-and-groove wall boards to the studs, tongue up and groove down.
- Row in your cedar panel boards, making sure they are level about once every four boards.
- Place the tongues into the grooves and proceed up the wall.
- Panelboards should be installed continuously until the insulated walls are completely hidden.
- Sauna Heater Wall Mounting in the MiddleTwo long and two short screws are included with the heater to help you mount it to the wall.
- They'll tighten the sauna heater to the wall and prevent it from moving.
- The installation instructions state that there should be a space of 6 inches between the bottom of the unit and the floor.
- We use our second set of lower screws after we have put the sauna heater on the wall.
- Assembling a sauna by plugging in an electric heater and then adding rocksInstall the sauna heater in accordance with the instructions provided.
- A large opening under the sauna door is used by some.
- A template and instructions are included with every sauna heater to show you at what height above the floor the warmer should be installed.
- Mounting brackets in the wall and an air vent underneath the sauna heater should also be considered.
- We advise cleaning the rocks for your sauna heater before using them.
- If you don't put the rocks in the sauna behind the heater element, the sauna's sensors can think the room is too hot and turn off the heat too soon.
- There is a common concern about whether or not the vulcanite sauna rocks should be in touch with the sauna heater.
- The sauna experience is perfected by the sauna rocks.
- Once you've confirmed that the grill of your sauna heater still fits, you may lay your rocks atop it.
- When you're done, fasten the sauna heater's grill to the top.
- Prepare the Sauna SeatsCreate or assemble the sauna seats next.
- Entrance to Sauna, SetupPut in a sauna door made of cedar that has already been prehung.
- The swing and the accompanying frame are included in this package.
- Installing the self-closing hinges and door knobs in the saunaOur door will need to be shimmed because of the difficult opening.
- A second set of hands will come in handy when you need to screw in the frame of your sauna door.
- Our favourite is the 2.5 "When installing the sauna's door, use galvanized deck screws.
- We the identical ones we put on the benches in the sauna.
- Verify the top and side reveals after you have installed the door frame and hinges.
- As a last step, install the sauna's corner trim.
- Your corner should be left alone if it looks fine the way it is.
- A set of 1"x1" corner trim is included in the package.
- Go out your finish trim nailer and nail the boards down on the best side.
- When you purchase a do-it-yourself sauna, you can relax knowing that everything you need is in one convenient place and that it's nearly impossible to make a mistake.
- You'll find everything you need, including detailed instructions written specifically for your needs.
- With a do-it-yourself sauna kit, you can be sure of exactly what you're receiving.


